
URL masking can enhance your site’s appearance, usability, and branding. If you have a subdomain, such as blog.yourdomain.com, and you wish to mask it to appear as yourdomain.com/blog, there are several ways to achieve this in WordPress. In this detailed guide, I will walk you through three effective methods: using a redirection plugin, leveraging PHP for dynamic URL masking, and modifying your .htaccess file.
Why Mask a Subdomain URL?
Before diving into the methods, it’s essential to understand the benefits of URL masking:
- Improved Branding: Uniform URLs create a cohesive brand experience.
- SEO Benefits: Consolidating URLs can prevent duplicate content issues and enhance rankings.
- User Convenience: Simplified URLs are easier for users to remember and share.
Let’s explore the methods in detail.
Method 1: Using a Redirection Plugin
For users without technical expertise, using a plugin is the easiest and most accessible option. Plugins handle the technical aspects, requiring minimal effort from you.
Step 1: Install a Redirection Plugin
- Access Your WordPress Dashboard:
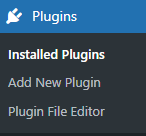
Navigate to your WordPress admin area by visitingyourdomain.com/wp-admin. - Go to Plugins Section:
- Click on Plugins in the left-hand menu.
- Select Add New.
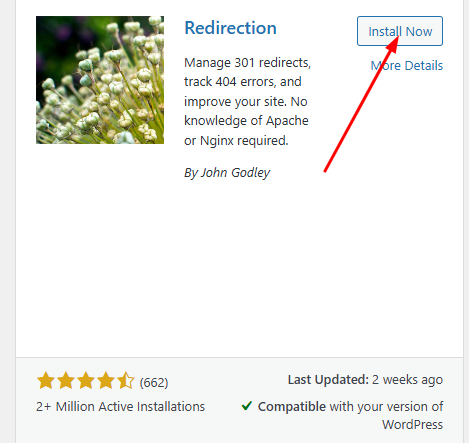
- Search for Redirection Plugins:
- In the search bar, type “Redirection” or “Pretty Links.”
- Identify a well-rated plugin and click Install Now.
- Activate the Plugin:
After installation, click Activate to make it functional.
Step 2: Create a New Redirection
- Navigate to Redirection Settings:
- Go to Tools > Redirection in the WordPress dashboard.
- Add a New Redirect Rule:
- Click on Add New Redirection.
- Configure the Redirection:
- Source URL: Enter the URL of your subdomain, e.g.,
http://blog.yourdomain.com. - Target URL: Enter the desired masked URL, e.g.,
http://yourdomain.com/blog.
- Source URL: Enter the URL of your subdomain, e.g.,
- Set Match Type and Redirect Type:
- Match Type: Select Exact Match for a precise redirection.
- Redirect Type: Choose 301 Moved Permanently for SEO-friendly redirection.
- Save Changes:
- Click on Add Redirection to implement the rule.
- Test the URL by visiting
blog.yourdomain.comto ensure it redirects toyourdomain.com/blog.
Read Also: WordPress: Pages vs. Posts vs. Custom Post Types
Method 2: Using PHP for Dynamic URL Masking
If you have a basic understanding of PHP, this method allows you to customize URL behavior directly within WordPress.
Step 1: Create a New PHP File
- Access Your Theme Directory:
- Use an FTP client (e.g., FileZilla) or your hosting’s file manager to access your WordPress installation.
- Navigate to
wp-content/themes/your-theme-name.
- Create a PHP File:
- In the theme directory, create a new file named
url-mask.php.
- In the theme directory, create a new file named
Step 2: Add Custom PHP Code
- Insert the Following Code:
function custom_redirect() {
    if (strpos($_SERVER['HTTP_HOST'], 'subdomain.yourdomain.com') !== false) {
        wp_redirect('http://yourdomain.com' . $_SERVER['REQUEST_URI'], 301);
        exit();
    }
}
add_action('template_redirect', 'custom_redirect');
- Customize the Code:
- Replace
subdomain.yourdomain.comwith the actual subdomain (e.g.,blog.yourdomain.com). - Replace
http://yourdomain.comwith your desired main domain.
- Replace
- Save the File:
- Save the
url-mask.phpfile and ensure it’s in the active theme directory.
- Save the
Step 3: Test the Redirect
- Access the Subdomain:
Visithttp://blog.yourdomain.comin your browser. - Verify Redirection:
Ensure that the URL redirects tohttp://yourdomain.com/blog.
Method 3: Using .htaccess for URL Rewriting
If you have server access and are comfortable editing configuration files, modifying the .htaccess file is a powerful option for URL masking.
Step 1: Access the .htaccess File
- Locate the File:
- Use an FTP client or your hosting’s cPanel to navigate to your WordPress root directory.
- The
.htaccessfile is typically located in the same folder aswp-config.php.
- Backup the File:
- Before making changes, download a copy of
.htaccessas a backup.
- Before making changes, download a copy of
Step 2: Add URL Rewrite Rules
- Insert the Following Code:
RewriteEngine On
RewriteCond %{HTTP_HOST} ^blog.yourdomain.com [NC]
RewriteRule ^(.*)$ https://yourdomain.com/blog/$1 [P,L]
- Customize the Code:
- Replace
blog.yourdomain.comwith your actual subdomain. - Replace
https://yourdomain.com/blogwith your desired masked URL.
- Replace
- Save the Changes:
- Save the modified
.htaccessfile. - Upload it back to the server if using FTP.
- Save the modified
Step 3: Test the URL Rewrite
- Access the Subdomain:
Visithttp://blog.yourdomain.com. - Verify the Masked URL:
Ensure the browser displayshttp://yourdomain.com/blogwhile accessing the subdomain’s content.
Best Practices for URL Masking
To ensure the success and safety of your URL masking efforts, follow these best practices:
Keep Backups
- Always back up your site, including files and the database, before making changes.
Use SSL Certificates
- Ensure that both your main domain and subdomain have valid SSL certificates to avoid security warnings.
Test Thoroughly
- Test redirections across different browsers and devices to confirm they work as expected.
Monitor SEO Impact
- Use tools like Google Search Console to check for crawling or indexing errors.
Troubleshooting Common Issues
Redirection Loops
- Problem: The subdomain keeps looping or refreshing.
- Solution: Verify the redirection rules in your plugin, PHP file, or
.htaccessfile to avoid conflicts.
Broken Links
- Problem: Some links on the masked URL result in 404 errors.
- Solution: Update internal links and ensure the correct paths are set.
Slow Page Load Times
- Problem: URL masking increases the time it takes to load a page.
- Solution: Optimize your server settings and ensure caching is enabled.
Read Also: 30 Top Free WordPress Themes
Conclusion
Masking a URL for a subdomain in WordPress can significantly enhance your website’s branding, user experience, and SEO performance. Whether you prefer the simplicity of a plugin, the customization of PHP, or the control offered by .htaccess rules, there’s a method suited to your expertise and needs.
By following this guide, you can confidently mask URLs for subdomains and maintain a professional, cohesive web presence. If you have any questions or face challenges during implementation, feel free to explore additional WordPress resources or consult your hosting provider for support.
